There’s something about a brisket that just makes a meal feel special. Maybe it’s the way the whole house smells when it’s cooking low and slow, or how everyone seems to hover around the kitchen asking when dinner will be ready. Either way, I’ve learned that a good brisket doesn’t need to be complicated.
This recipe is the one I come back to again and again. It’s got everything you need and nothing you don’t. The secret is starting with quality beef that has good marbling, then letting those onions and tomato paste work their magic. You layer everything in, let the oven do most of the work, and a few hours later you’ve got tender, fall-apart meat that’s worth the wait.
I used to think brisket was only for big holidays or when I had all day to babysit something on the stove. But honestly? Once you get the hang of it, this is easier than most weeknight dinners. Just plan ahead a bit and you’re golden.
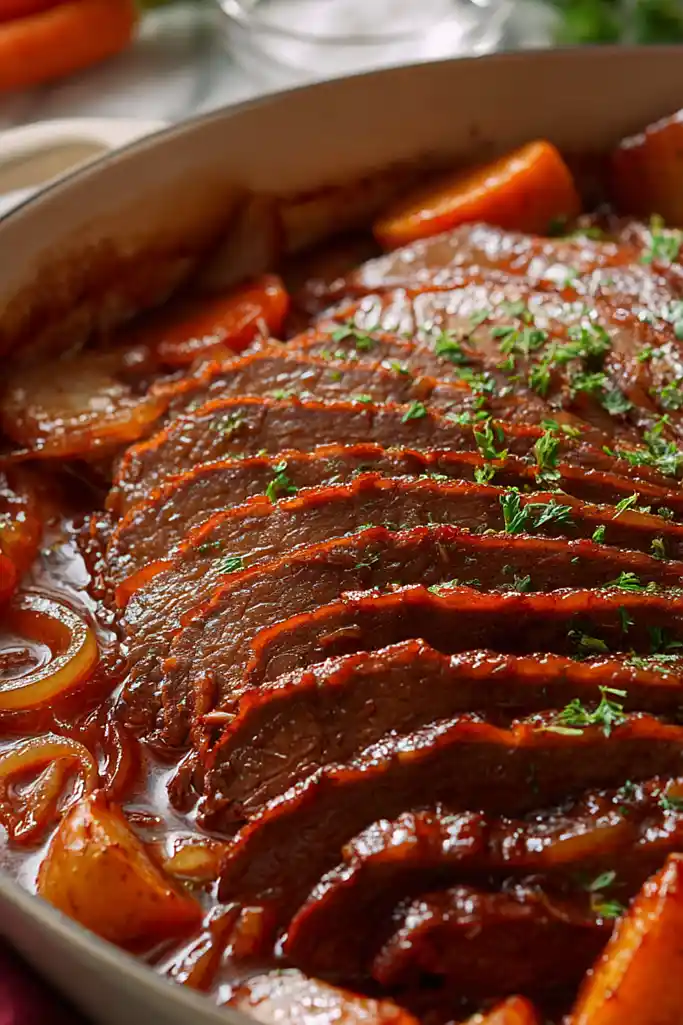
Why You’ll Love This Brisket
- Melt-in-your-mouth tender meat – The slow braising process transforms this cut into incredibly tender, flavorful beef that practically falls apart with your fork.
- Perfect for feeding a crowd – This recipe makes enough to serve 8-10 people, making it ideal for family gatherings, holidays, or meal prep for the week.
- Simple, everyday ingredients – You probably already have most of these pantry staples on hand, with no fancy or hard-to-find items required.
- Make-ahead friendly – Brisket actually tastes better the next day, so you can prepare it in advance and reheat it when you’re ready to serve.
- Passover-friendly option – With the matzo cake meal substitution, this recipe works perfectly for your Passover table without sacrificing any flavor.
What Kind of Brisket Should I Use?
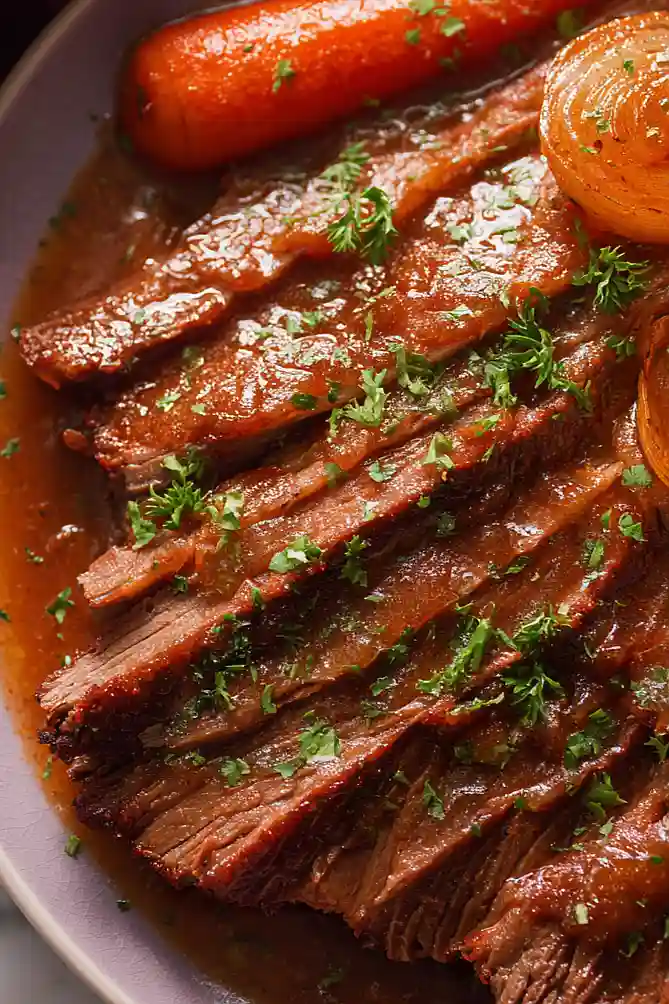
For this recipe, you’ll want to grab a first-cut brisket, which is sometimes called the flat cut at the grocery store. This cut is leaner and slices more neatly than the second cut, making it perfect for a classic presentation. When you’re at the butcher counter, look for a piece that still has a thin layer of fat on top – don’t let them trim it all off, as that fat will keep your brisket moist during the long cooking process. If you can only find a second cut (also called the point), it’ll still work great, it just has more marbling and might be a bit fattier, which some people actually prefer for extra flavor.
Options for Substitutions
This classic brisket is pretty straightforward, but here are a few swaps you can make if needed:
- First-cut brisket: The first-cut (or flat-cut) is leaner and easier to slice, but you can use the second-cut (or point-cut) if that’s what’s available. Just know it has more fat marbling and might be a bit harder to slice neatly, though it’ll be just as tasty.
- Yellow onions: White onions or sweet onions like Vidalia work fine here. The onions break down during cooking to create that rich sauce, so any variety will do the job.
- Vegetable oil: Canola oil or any neutral cooking oil works just as well for searing the brisket. Avoid olive oil since it has a lower smoke point.
- Carrots: You can swap carrots for parsnips, or use a mix of both for a slightly different flavor. Cut them about the same size so they cook evenly.
- All-purpose flour: The recipe already mentions matzo cake meal for Passover, but you can also skip the flour entirely if needed – it’s mainly used to help brown the meat and thicken the sauce slightly.
- Kosher salt: Don’t substitute the kosher salt – it’s important for properly seasoning the large piece of meat. If you only have table salt, use about half the amount since it’s more concentrated.
Watch Out for These Mistakes While Cooking
The biggest mistake you can make with brisket is slicing it with the grain instead of against it, which will leave you with chewy, stringy meat no matter how long you cooked it – look for the lines running through the meat and cut perpendicular to them for tender slices.
Over-trimming the fat is another common error since that thin layer of fat keeps the brisket moist during the long cooking time, so resist the urge to remove it all.
Don’t skip the browning step even though it seems like extra work – those caramelized bits on the meat and stuck to the bottom of the pot add serious flavor to your final dish.
Finally, rushing the cooking process by raising the temperature will give you tough, dry brisket, so plan ahead and give it the full low-and-slow treatment it needs to become fall-apart tender.
What to Serve With Brisket?
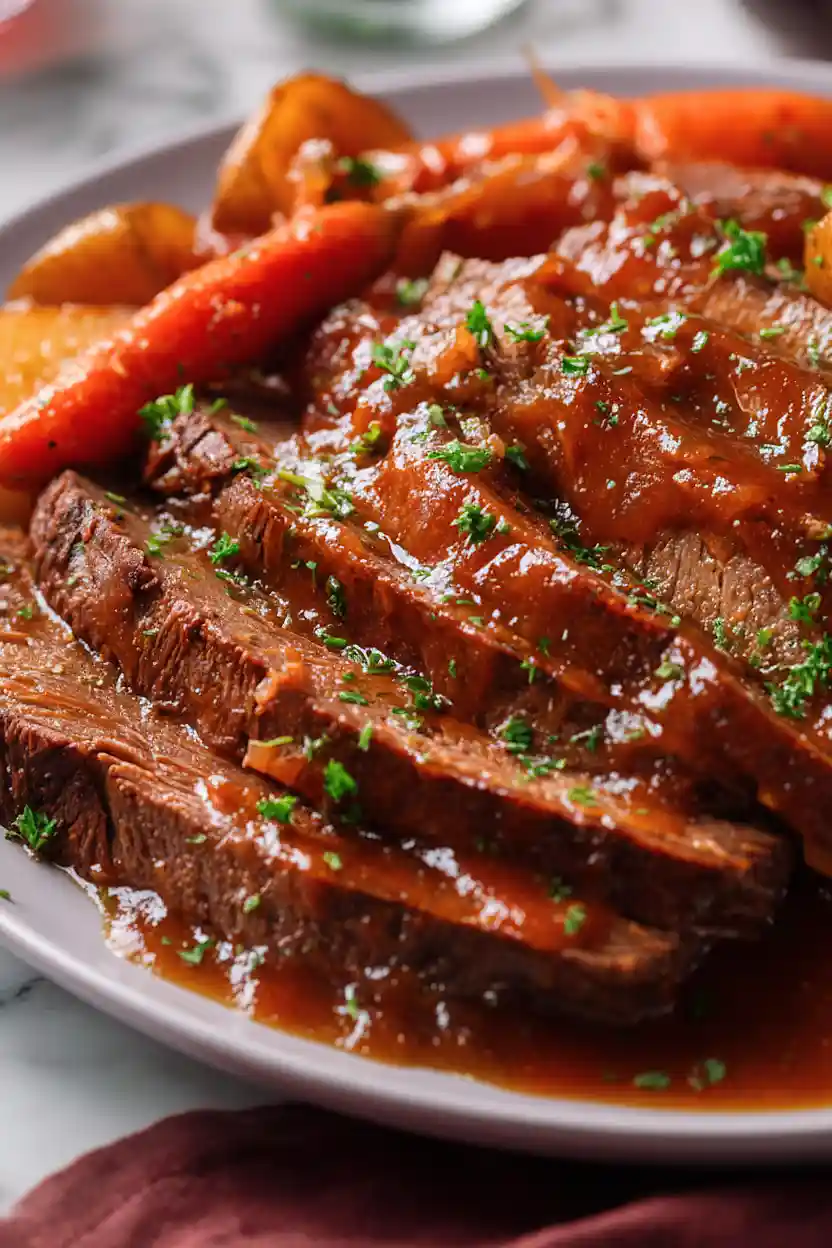
Brisket is one of those dishes that practically begs for good sides to soak up all that rich, savory gravy. I love serving it with creamy mashed potatoes or egg noodles, which are perfect for catching every bit of sauce. A simple side of roasted or steamed green beans adds a nice fresh contrast to the richness of the meat, and don’t forget some crusty bread or challah for mopping up your plate. If you want to round out the meal, a crisp coleslaw or simple cucumber salad brings a refreshing crunch that balances everything out nicely.
Storage Instructions
Store: Brisket actually gets better after a day or two in the fridge! Let it cool completely, then store it in an airtight container with all those yummy juices for up to 4 days. The flavors really meld together overnight, making it even more delicious the next day.
Freeze: This is one of those recipes that’s perfect for freezing. Slice the brisket and pack it in a freezer-safe container with the gravy and veggies, and it’ll keep for up to 3 months. I like to portion it out so I can thaw just what I need for dinner.
Reheat: The best way to reheat brisket is low and slow in the oven at 325°F, covered with foil, until warmed through. You can also warm it gently on the stovetop with a little extra beef broth if the gravy has thickened up too much in the fridge.
| Preparation Time | 30-40 minutes |
| Cooking Time | 210-250 minutes |
| Total Time | 240-290 minutes |
| Level of Difficulty | Medium |
| Servings | 8 servings |
Estimated Nutrition
Estimated nutrition for the whole recipe (without optional ingredients):
- Calories: 4200-4700
- Protein: 315-350 g
- Fat: 260-310 g
- Carbohydrates: 150-180 g
Ingredients
- 6 lb beef brisket (high-quality marbling preferred)
- 2 tbsp salt
- 1.5 tsp freshly ground black pepper
- 2.5 tbsp flour
- 3 tbsp neutral cooking oil
- 8 large onions, sliced into 1/2-inch rings
- 4 tbsp rich tomato paste
- 5 garlic cloves, smashed
- 6 carrots, peeled and cut into 2-inch chunks
- 1 cup beef stock (to prevent scorching and add depth)
- 3 sprigs fresh thyme
- 1 handful fresh parsley, chopped for garnish
Step 1: Prepare Mise en Place and Season the Brisket
- 6 lb beef brisket
- 2 tbsp salt
- 1.5 tsp freshly ground black pepper
- 2.5 tbsp flour
Pat the brisket dry with paper towels—this is crucial for achieving a good crust when browning.
Combine salt, pepper, and flour in a small bowl, then season the brisket generously on all sides, patting the mixture firmly so it adheres.
Let the seasoned brisket rest at room temperature for 15-20 minutes while you prepare the vegetables.
Preheat your oven to 350°F.
Step 2: Sear the Brisket to Develop Color and Flavor
- 3 tbsp neutral cooking oil
- seasoned brisket from Step 1
Heat the oil in a large Dutch oven or heavy-bottomed pot over medium-high heat until it shimmers.
Carefully place the brisket in the pot and sear for 5-7 minutes per side, resisting the urge to move it—this creates a flavorful brown crust.
I always look for a deep golden-brown color on both surfaces, as this builds tremendous flavor through the Maillard reaction.
Once browned, transfer the brisket to a clean plate.
Step 3: Build the Aromatic Base with Onions and Tomato Paste
- 8 large onions, sliced into 1/2-inch rings
- 4 tbsp rich tomato paste
In the same pot with the browned bits still clinging to the bottom, add the sliced onions and cook for about 15 minutes, stirring occasionally, until they soften and begin to caramelize.
Once the onions are golden and translucent, stir in the tomato paste and cook for 2-3 minutes to caramelize it slightly, which deepens its savory flavor.
This foundation creates a rich braising liquid that will braise the meat beautifully.
Step 4: Assemble and Begin Braising in the Oven
- seared brisket from Step 2
- caramelized onion and tomato paste mixture from Step 3
- 5 garlic cloves, smashed
- 6 carrots, peeled and cut into 2-inch chunks
- 1 cup beef stock
- 3 sprigs fresh thyme
Return the seared brisket to the pot, nestling it on top of the onion mixture.
Scatter the smashed garlic cloves and carrot chunks around (not on top of) the meat, then pour the beef stock around the edges to prevent scorching and add depth to the braising liquid.
Tuck the thyme sprigs into the vegetables, cover the pot with a tight-fitting lid, and place it in the preheated 350°F oven.
Braise for 1.5 hours without opening the lid—this allows the meat to begin tenderizing gently.
Step 5: Slice and Continue Braising at Lower Temperature
- braised brisket with vegetables and braising liquid from Step 4
Remove the pot from the oven and carefully transfer the brisket to a cutting board.
Slice it against the grain into half-inch thick pieces—I find that a sharp carving knife and a deliberate, single-motion slice (rather than sawing) keeps the meat tender.
Return the sliced brisket to the pot in a single layer, pouring any accumulated juices over it.
I like to arrange the slices so they nestle back into the braising liquid and vegetables for more even cooking and flavor absorption.
Reduce oven temperature to 325°F, cover the pot, and return it to the oven for another 1.75-2.5 hours until the meat is fall-apart tender when tested with a fork.
Step 6: Finish and Serve
- finished brisket from Step 5
- 1 handful fresh parsley, chopped for garnish
Remove the pot from the oven and let it rest for 5 minutes before serving.
The brisket should be incredibly tender and the braising liquid rich and glossy from the rendered fat and collagen.
Taste the liquid and adjust seasonings if needed.
Spoon the meat, vegetables, and braising liquid into serving bowls or onto a platter, then garnish generously with fresh chopped parsley for brightness and color contrast.
Easy Classic Brisket Recipe
Ingredients
Method
- Pat the brisket dry with paper towels—this is crucial for achieving a good crust when browning. Combine salt, pepper, and flour in a small bowl, then season the brisket generously on all sides, patting the mixture firmly so it adheres. Let the seasoned brisket rest at room temperature for 15-20 minutes while you prepare the vegetables. Preheat your oven to 350°F.
- Heat the oil in a large Dutch oven or heavy-bottomed pot over medium-high heat until it shimmers. Carefully place the brisket in the pot and sear for 5-7 minutes per side, resisting the urge to move it—this creates a flavorful brown crust. I always look for a deep golden-brown color on both surfaces, as this builds tremendous flavor through the Maillard reaction. Once browned, transfer the brisket to a clean plate.
- In the same pot with the browned bits still clinging to the bottom, add the sliced onions and cook for about 15 minutes, stirring occasionally, until they soften and begin to caramelize. Once the onions are golden and translucent, stir in the tomato paste and cook for 2-3 minutes to caramelize it slightly, which deepens its savory flavor. This foundation creates a rich braising liquid that will braise the meat beautifully.
- Return the seared brisket to the pot, nestling it on top of the onion mixture. Scatter the smashed garlic cloves and carrot chunks around (not on top of) the meat, then pour the beef stock around the edges to prevent scorching and add depth to the braising liquid. Tuck the thyme sprigs into the vegetables, cover the pot with a tight-fitting lid, and place it in the preheated 350°F oven. Braise for 1.5 hours without opening the lid—this allows the meat to begin tenderizing gently.
- Remove the pot from the oven and carefully transfer the brisket to a cutting board. Slice it against the grain into half-inch thick pieces—I find that a sharp carving knife and a deliberate, single-motion slice (rather than sawing) keeps the meat tender. Return the sliced brisket to the pot in a single layer, pouring any accumulated juices over it. I like to arrange the slices so they nestle back into the braising liquid and vegetables for more even cooking and flavor absorption. Reduce oven temperature to 325°F, cover the pot, and return it to the oven for another 1.75-2.5 hours until the meat is fall-apart tender when tested with a fork.
- Remove the pot from the oven and let it rest for 5 minutes before serving. The brisket should be incredibly tender and the braising liquid rich and glossy from the rendered fat and collagen. Taste the liquid and adjust seasonings if needed. Spoon the meat, vegetables, and braising liquid into serving bowls or onto a platter, then garnish generously with fresh chopped parsley for brightness and color contrast.